My husband's birthday was last week. He is a musician and has acquired a surplus of band tees over the years. I always wanted to make him a tshirt quilt but lack the patience to hover over a sewing machine for hours. He recently put a bunch of these shirts in our donate bin. I had a brainstorm and decide to upcycle these shirts into some wall art.
 |
| Add caption |
You are going to need some canvases,a staple gun and scissors. I bought 2 packs of canvases from a local craft store (on sale, about $2-3 a piece). I also spotted some square canvas art at my local dollar store that I could have used.
 |
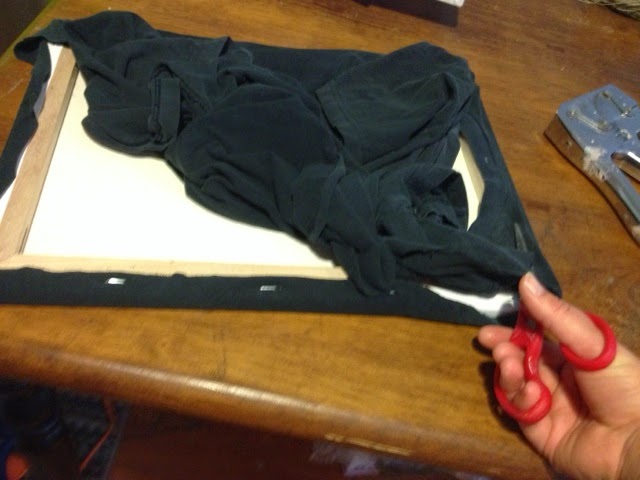
| Slide the canvas into the tee, center and drape the t-shirt. |
 |
Flip the shirt and staple the top.
Don't be afraid to flip it over and check to make sure the design is centered. |
 |
Staple the center bottom, and center sides, pulling tightly each time you staple.
Then top left, bottom right, and the sides. Then finish stapling so there are three staples on each side.
Staples can be removed with pliers if you make a mistake! |
 |
| You t-shirt design should be tight, not sagging. Pull too tight and your design will become off centered. |
 |
Once you are happy with your design, trim away the extra shirt.
*NOTE- my husband had these shirts in a donate bin, I did not do this with his favorite shirts. I can not be held responsible for negative reactions from spouses. |
 |
The last step is to fold over the corners and staple. Fold and tuck the corner as shown.
The folded part shown should be facing the top or bottom of your canvas so it is not visible once hung. |
 |
Easy art for the dude room or man cave! These can easily be done with your running tee collection or
your child's favorite shirts as well. Shirts with patterns would be pretty in an office or bedroom. |
 |
| So much better than a t-shirt quilt. |
There you have it-10 minutes, $3 and an easy project to give as a gift for someone special! Happy DIY-ing!


No comments:
Post a Comment